|
|
Post by Slam_Shifter on Nov 27, 2005 20:55:31 GMT -5
Anything you think that helps a "y" frame mopar can go here.
|
|
|
|
Post by dadicted on Nov 30, 2005 11:03:21 GMT -5
well i will start this out. colaps the y and weld it or mount ur shock bumper inside the Y and weld it solid. heres a pic of a Y framer.  i will copy and past what i wrote on the idda site and put it here. |
|
|
|
Post by dadicted on Nov 30, 2005 14:45:27 GMT -5
heres what i wrote in the other site. ok i will take this slow, try to keep up and dont be to critical until you have read the whole thing. take a very good shock bumper, drill a hole to drain the shock. PULL THE SHOCK AS FAR OUT AS YOU CAN, BUT NOT SO FAR TO WHERE IT COMES APPART, AND WELD IT SOLID. this is very important, but dont be to critical so soon. look at this pic of a y framer. pic2.picturetrail.com/VOL949/3366794/8372959/116786188.jpgdoes it look like to you that a shock would fit inside that Y? it does to me. the 2 pieces of metal that are welded to the bumper take off some how. fit the shock in the middle of the Y and weld all sides that touch the Y in any way to keep the shock steady, you can also drill a hole out the back of the Y to put a nut on the bolt that comes out the back end of the shock. then take the pieces of metal that you took off that are welded to the bumper in the pic and put them on either side of the area of the shock you pulled out and weld them back in place solid. then you can attach your bumper, if its not already attached, it will be welded to the shock, and the 2 pieces of metal that it is welded to in the pic to give it some extra strength. you have filled the Y with the shock, weld, and even a extra piece of metal here or there to get it to touch the best. so you didnt plate the Y, but you have still strengthened it the same ammount. if you do this and weld all the creases in the shock and attach thoes 2 pieces of metal and weld it solid where it touches, i dont think you will have problems with the shock ripping off. a wire welder (with gas)will do the best job here to fill in the cracks and you will be able to fill in the gaps with plain weld. let me know what you guys think about this. no imp sub, no 9wire, and you still have a non plated Yframe. |
|
dm440c
Rat
 build it to break it
Posts: 7
|
Post by dm440c on Dec 2, 2005 23:07:56 GMT -5
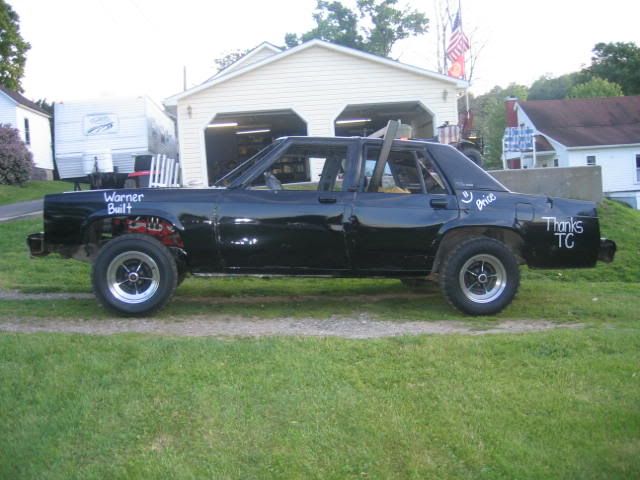
this is just a copy-n-paste of what I posted on the "other" site. Feel free to comment on anything I left out, although it is intended to be as general as possible to fit as many different rules as possible. Also, if you have good pics to help illustrate any of the points, send them to me and I'll modify the post65 – 73 Chrysler, Dodge, and Plymouth full size
a.k.a “Y frame” cars
The full size C body cars from these years all shared the same basic chassis and subframe with some subtle differences. The 65 – 68 styling had a squared, angular look and was known as the “slab sided” era for obvious reasons. The 69 – 73 was known as the “fuselage” era as these were much more rounded. The relative toughness of the two eras is comparable and it is debatable whether one is better than the other, although most believe the 65-68 is better. One thing is for certain, that is that the front bumpers of any of these years are not of the quality found in the later 70’s, although the 73 bumpers are the best of this era and the 73 frames have an additional gusset up front to add a little strength. Subframes are easily interchangeable, although the earlier ones bolted directly to the body and the later ones had rubber isolators. Small and big block drivetrains are a fairly simple swap as well in most cases. Frames: The one glaring weakness of the Y frame cars is the Y itself, which is the large open space at the very front of the main frame rails near the core support. The best fix is to weld ¼” plate top and bottom to “box in” this section. If the rules allow bumper swaps and allow welding bumpers to the frame, then the above post that describes welding bumper shocks into the frame is the best way. If these ares prohibited by the building rules, the next best thing is to add two large bolts directly through the Y on both sides in such a way that the two branches of the Y are joined together by the bolts. If none of these tricks will make it through inspection, these are still good cars but the strength of the front end is considerably diminished and this should be reflected in the driving tactics. The older cars bolt the body directly to the subframe, but the newer ones have rubber biscuit isolators in between. Remove these and bolt direct for strength. Also, there are six mounting points stock (not including core support) but there are provisions for two more, one on each side just in front of the rear mounts under the front seat. Drill holes if necessary and add the extra bolts here, although there should already be corresponding holes in the body covered by a rubber plug. If allowed, subframe connectors will improve the stiffness of the car by connecting the front subframe to the rear frame at the spring mounts. Changing the front bumper to a shock bumper, such as a 74 – 78 Mopar C body, 74 –76 Chevrolet, or some models of Cordoba or Volare, will be a big improvement over stock bumpers but this may come at a price. If the stock Y frame is not plated or bolted, it may be overpowered by these stout bumpers and bend in objectionable ways. If the rules require stock frame configuration, the best choice may be the 73 bumper. Chassis: Adjust the front torsion bars to ¾ of maximum preload setting by turning in the adjuster bolts. It may be argued that using the full adjustment may place too much stress on the suspension components. Use drum brakes in the front (spindles are interchangeable on all years) or if using front discs, block the front brake lines at the master cylinder and remove the calipers and caliper brackets to prevent wheel lock up. I like to remove the booster entirely and use the master cylinder from a non-power brake car, such as a 68 Fury. The holes are already in the firewall but you will have to fabricate a new brake pushrod. Remove the front sway bar entirely. Cut off the two metal tabs from the frame where the inner sway bar mounts attach to avoid them bending into things such as the fuel pump. Run chain through the floor and over the tops of the frame humps in the rear, then down around the axle- this will prevent the body from “humping up” away from the axle. This is especially important with wagons. Tighten to the point that the rear springs are close to flat. Many derbiers feel it is preferable on Mopars for the front to be higher than the rear. Never run without the rear shock absorbers, especially if no chain is used around the axle. Clamp or use duct tape on the rear springs at any point where the end of an individual leaf meets the next consecutive leaf. The most important is where the second leaf meets the main leaf in the rear. If possible, relocate the leaf springs inward so that they mount directly in line with the main frame rails. Reinforce the steering rag joint with chain, tape, or replace it entirely by cutting out a section of sidewall from an old tire and bolting it in. Alternately, a small u joint can be grafted in place of the rag joint. The biscuit style motor mounts are prone to separating so the engines should be tied to the frame with chain, metal straps, or any other acceptable method. If the lower radiator hose is on the driver’s side for a big block car, it tends to get into the power steering pump as things bend up and in. Switch to a later style (73 – 78) water pump and corresponding radiator that has the lower hose on the passenger’s side. Body: The trunks are tough but they are also very long. If left stock, they tend to bend where the trunk lid meets the rear roof pillars, then the entire trunk section goes upward very quickly until it is flattened against the rear window and pointed skyward. This is neither easy to see through nor is it an effective way to hand out damage to opponents, so steps should be taken to prevent it. Rules for individual derbies dictate what can be done, but the most extreme would be to tuck the trunk lid, notch the frame in front of the rear spring mounts, and tie it all together with Allthread from the trunk lid through the frame.  Alternately, different combinations could be attempted based on rules, but at a minimum the trunk lid should be hammered downward to create a concave surface that is more likely to compress and fold inward rather than upward. The exact placement and pattern is a matter of personal preference. Try experimenting with different combinations of light notch, heavy notch, no notch, tuck or no tuck, full lid, half lid, or no lid, and bumper or no bumper. Older cars have the inner front fenders bolted directly to the subframe, but on the newer ones the inner fenders float with just rubber splash guards connecting them to the subframe. After removing the frame rubbers, it will add a lot of strength to find a way within your rules to tie the inner fenders to the subframe. Hammer the sheet metal on the sides of the rear quarters inward to the trunk to ensure it folds together instead of blowing outward. This is especially important on the 69-73 Fuselage cars. Hammer the very bottoms of the rear quarters (the trunk extensions) up until they meet the trunk floor, then bolt or weld them together. Cut the sheet metal around the rear tires and fold it up and out away from the rear tires, then bolt or weld it back together. If some clearance is not created, the metal WILL bend in and rub on the tires (or worse). Cut away the sheet metal of the fenders in front of the front tires, also trim the ends of the bumpers, otherwise these will be rubbing on your front tires after a few good hits.  Weld or bolt together wherever two sheet panels meet or share a surface as rules allow. Of particular importance are every mating surface of the radiator support and also the inner front fenders. The rear frame rails are merely spot welded to the trunk floor, so this should be improved as allowed. Fold hood and ends of front fenders around the radiator support. The radiator mounts are not very strong, so tie the radiator to the support with additional pipe strap, wire, or ratchet straps. Our preferred method has become using small gage wire on the top two mounting holes, then two black rubber bungee cords in a criss-cross pattern to hold the radiator to the support. No bolts. This way, when the support bends the radiator tends to float instead of bursting.
|
|
dm440c
Rat
build it to break it
Posts: 7
|
Post by dm440c on Dec 2, 2005 23:19:22 GMT -5
the picture of the frame above is from a 73 Polara I ran on Labor Day, here's the car after I brought it home:  partly built:  wiring the hood shut before the show. You can see the notches cut and hammered into the top of the rear fenders along with the lid crease:  and afterwards. The trunk folded pretty well but the lid didn't cooperate as well as it would have if it had been tucked.  The front was pretty much stock after the inspectors made me cut everything out and the frame ended up wadded into the right front tire. In this pic, we've already torched, hammered, and bent the metal away from the tire so that the car can be steered and driven again:  |
|
|
|
Post by Slam_Shifter on Dec 6, 2005 18:58:13 GMT -5
Nice work guys. Almost a perfect thread. Couple different methods to do things and pictures of how it was done and how it worked. Good Deal.
|
|
|
|
Post by stris141 on Dec 7, 2005 1:08:17 GMT -5
We did things a bit different, with the 69 to 72 Chryslers. I agree, that the middle part of the front bumper, is nothing. But the corner of them, and the fenders, are very strong. You don't hit with the full front, but with those corners. And you want to try and "scoop" the hit. In other words, don't plan on hitting straight at something. But use those tips, to hit and cut your wheel, as you do. You can really knock out cars this way. If you do it right, you could almost go in a circle, and hit the car again. I've done it a number of times. We learned this, when we could only use chain. But with bolts, you can make it pretty tuff up front. Take out the hood springs. This will help keep the monster of a hood, down. We try and put bolts, in the front corners, and mid-way up the hood, at least. More if you can.
We also did the trunks a bit different. If I can do it, I'll try and find the post, from the other site. But I like the idea of tucking one. Not allowed here.
Steve
|
|
|
|
Post by stris141 on Dec 12, 2005 15:07:56 GMT -5
OK, here's what I found. If this doesn't make since, I'll try and say it better.
If you're allowed to pre-bend the trunk, then you can get away without notching. Just really pre-bend the trunk down, about 6 or 7 inches from taillights. Or, if you want, try this. Don't notch a V into the frame. Just cut a slot across the top of frame. And still pre-bend. If they do not, allow pre-bending, then I'd notch, with a V. But not real deep. Only about 1" deep, and maybe 11/2" to 2" wide. Remove the trunk springs. And, if allowed to weld the trunk, the springs will make good gap rod. You can also cut the top double bottom, of the trunk floor. You have to do a SHALLOW cut, where the trunk floor starts to go up, to the lock area. You'll see a dimple, that runs just about all the way across, there. That's where to do your cut. You can also cut the inside ridges of the trunk lid, just forward of where you cut the floor. Have someone spray water, on the outside, as you cut. It'll help keep from blowing thru the outer skin. You can also do the trunk cutting, if allowed to pre-bend, if you want.
A couple other things I forgot. Where you do your cuts, in the floor and trunk lid support, you want to cut the rain gutter in the trunk. Of course, remove the rubber around the trunk. Then cut about a 3/4" section, out of each side of the rain gutter there. Inside the trunk you can also make a cut, down the sides of the rocker panels, where you make the floor cut. Look underneath the trunk, and you'll see where the frame is. Go toward the outside a bit, and make/burn/drill a spot, so you can see where to cut, inside the trunk. Go down insdie the panels, as far as you can. Make sure there's nothing that will burn down there. There was a old broken up flare, we didn't see once. What a fire/smell.LOL
Another little trick, is to take a hacksaw, and make a cut down, each fender, at the same spot. Make two cuts, about 3/4" apart, as far down as the hacksaw will cut. Then push the tab down. This also helps the trunk bend. We glue a washer there, and tie some helium balloons to it. Looks like we're having fun. But it kind of hides it. Or maybe glue some flags, etc there.
If you can bolt the trunk, that's a good way to go. At least put a bolt, at each corner of the lid, by the rear window. Also in the middle. This helps keep that place on the lid, from popping up. A set of J-bolts, made out of 3/4" or 1" allthread, is good. Place the J around the frame, and go up thru the trunk. Use big plates for washers, and bolt it down.
If you can't bolt, then do the same, with #9 wire/chain. We make four holes, at the cut area, on each side of trunk. Two of the holes, in the trunk lid, and two in the fender. Make the holes, on each side of the cut area. So what you'll get, is two sets of wire/chain on each fender, on each side of the cut area . Also, up about half way, do another set or two of the holes.
On top of all that, if you can pre-bend the trunk, do it at the cut area, from fender to fender.
Hope that all makes sence.
Steve
|
|
|
|
Post by dadicted on Dec 12, 2005 21:17:00 GMT -5
ok, hopfully slam, and shorty dont hate me for this, but this is what i was talking about above.   |
|
|
|
Post by stris141 on Dec 13, 2005 1:23:29 GMT -5
Kind of hard to see the bottom picture. But the top one really looks like it would work, to put a bumper shock in there.
Steve
|
|
|
|
Post by demoboy on Feb 5, 2006 14:07:36 GMT -5
Matt.... that's F*#k!ng brilliant. sometimes the really obvious stuff gets by us (it did me...). Thanks for those pics.
|
|
|
|
Post by Shorty Thompson on Feb 5, 2006 16:25:17 GMT -5
I won't . I can't speak for Slam . I don't think he'll mind though . I'm fairly certain that had he been asked that he would've posted it hisself .
As we're on this topic . This is Slam's set up and from what I've seen it's very effective . I can't/won't divulge any secrets left to this setup . Truth is I've forgotten most of what was told to me . I know from the before /after pics that I've seen the setup has sprung new interest by me in the "Y" frame subs . Most people that I know of will almost give you these subs , just to get rid of them . When best kept secrets of mice and men might just be getting out , lol .
|
|
|
|
Post by dadicted on Feb 5, 2006 16:29:22 GMT -5
Matt.... that's F*#k!ng brilliant. sometimes the really obvious stuff gets by us (it did me...). Thanks for those pics. there not my pics. i didnt build that car. slam did and i stole them. dont give me the credit. its not my doing. lol. ;D ;D |
|
|
|
Post by Shorty Thompson on Feb 5, 2006 16:47:31 GMT -5
lol , matt
|
|
|
|
Post by demoboy on Mar 2, 2006 23:36:58 GMT -5
oh well. either way, I certainly appreciate the help. the #1 reason that my 65 has not been run the last 2 years is that I dont want to waste the car. I think that will really help.
|
|
|
|
Post by dadicted on Mar 2, 2006 23:59:09 GMT -5
just trying to help. lol.
|
|
|
|
Post by demoboy on May 27, 2006 21:39:44 GMT -5
been workin on the '65 NY Wagon... did the bumper/bracket... so far so good... but I would make sure to set the hole closer to the top or bottom of the frame next time so that it welds easier. other projects in the next couple days... will update as info is available.  |
|
|
|
Post by demoboy on May 27, 2006 21:43:58 GMT -5
(might even take some pics if I think I can figure out how to put them on here)
|
|
|
|
Post by stris141 on May 28, 2006 12:07:17 GMT -5
Oh pictures! Cool!! LOL Sounds like you're doing pretty good with it.
Steve
|
|
|
|
Post by demoboy on Jul 6, 2006 14:27:44 GMT -5
pics are still coming, just gotta find the time to do it...
good golly miss molly that car held up awesome... the front end idea was ideal. took a track shot to my front pass wheel, busted up my ball joint and tie rod... but it made finals and have a relatively straight car for the next run!
|
|
|
|
Post by demoboy on Jul 6, 2006 14:49:23 GMT -5
***used front bumper and shock brackets
from 77 Fury wagon
|
|
|
|
Post by stris141 on Jul 7, 2006 13:58:18 GMT -5
Very cool!!! Sounds like you had a blast with it. And more to come.LOL
If you can't figure out how to post pictures, I'm sure there are others on here, who can.
Steve
|
|
|
|
Post by demoboy on Jul 8, 2006 17:37:59 GMT -5
okay... Im actually waiting for my brother to get back to town with the cam... it's got the pics... but if I cant get it figured out, I'll start askin around |
|